
Configuring Jenkins for CloudBees
During my Java Internship program at my new job we had to develop an enterprise-like project to learn some new things and development processes. Continious integration was a big part of it.
What is CloudBees?
CloudBees is a Platform as a Service (PaaS) company that provides you with everything you need to move things to Cloud for free if you are a student.
The main features include:
* Jenkins Continuous Integration Server
* Run at Cloud feature (free cloud hosting for your applications, both web server and application server supported)
* Cloud Database (MySQL)
* Cloud Repository (Git, SVN, Maven)
Besides CloudBees has very responsive tech support. They helped me a lot when I was in need. They also did frequent free webinars which also were quite helpful. CloudBees does not even require a credit card info for their free tier.
Of course if you are free user some of those features have certain restrictions (e.g. 300 minutes per month for the Jenkins CI Server), but in our case it was more than enough.
Run at Cloud Configuration
After you logged in to the system you see Control Panel. Add a new application in Applications section there.

Then choose a *.war file from the list. After that you will be able to choose an application container (EJB or just servlet container). Basic Java Webapp option usually assumes Tomcat 6. The newer versions of Tomcat also supported but require some additional manipulations.
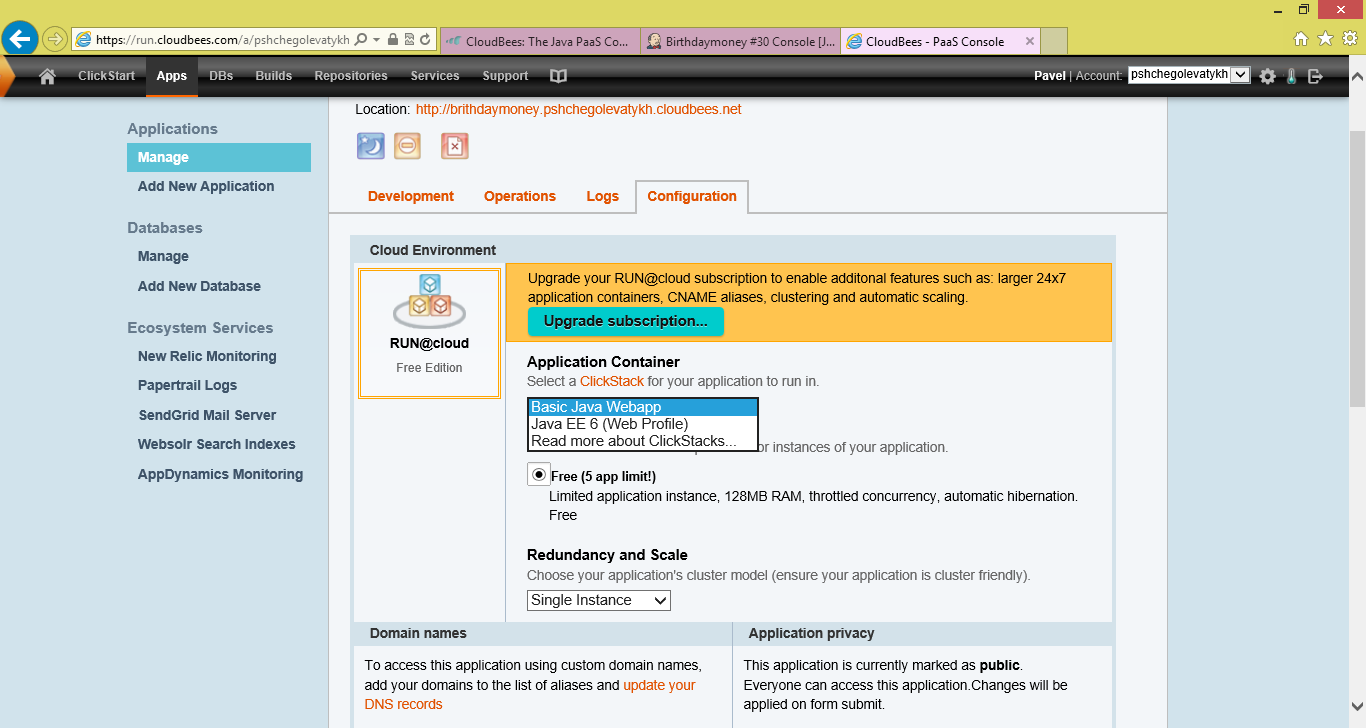
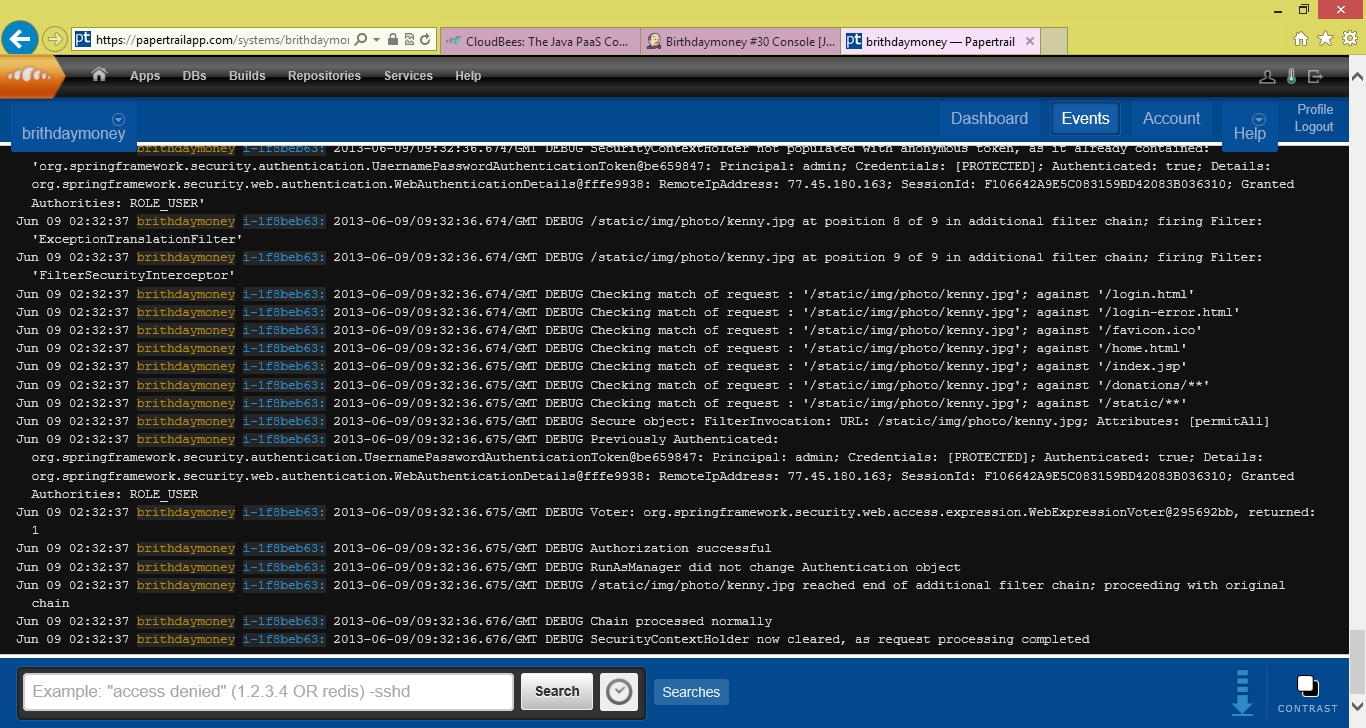
If you have any flat file loggers in your application (like log4j) you should switch them from the file to console output, because you do not have direct access to the server file system. Unfortunately the HTTPS authentication was not supported for a free tier. You have to disable it. To make working with logs easier (e.g. search for particular things) there is an addon called Papertrail.
You should enable it for your app.
Jenkins Configuration
To create a build server instance on CloudBees you should go to the Control Panel and click add button under Builds section. When the initial configuration is done choose Manage Jenkins from the left hand side menu and then click on Configure System.
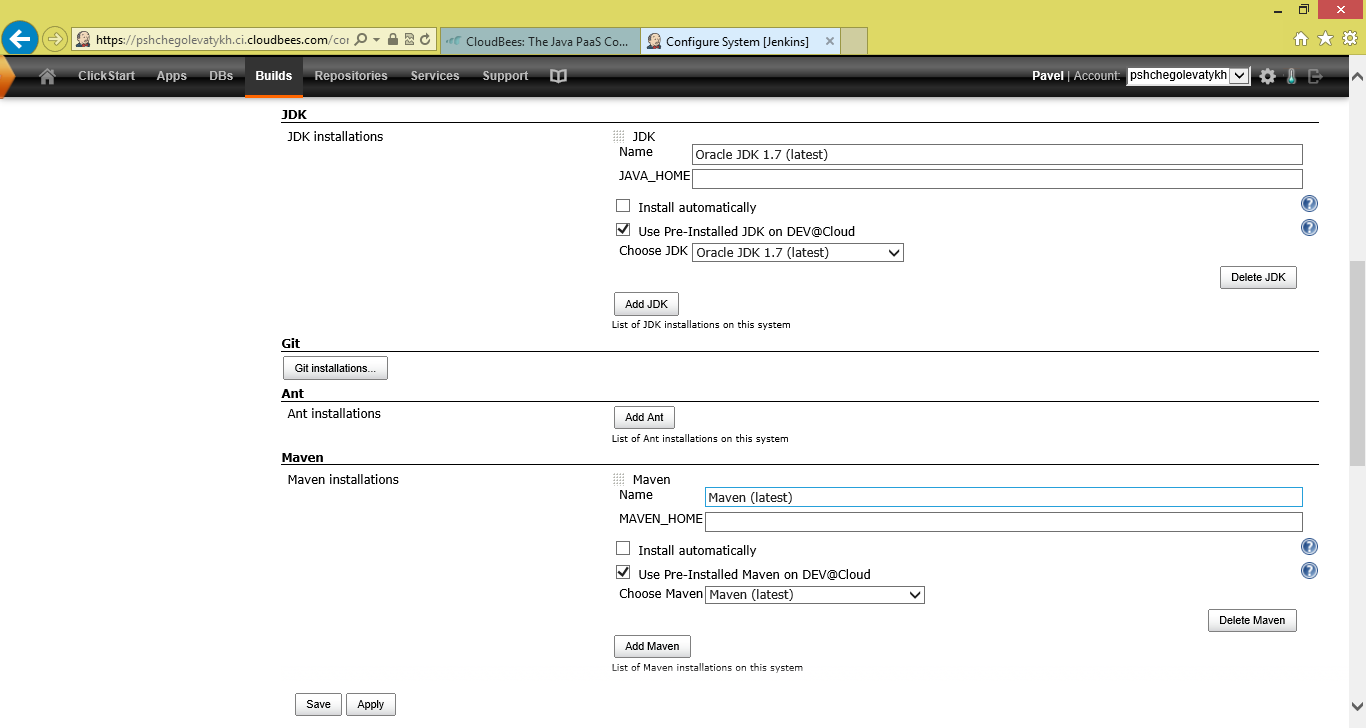
There are many properties, but the most important are JDK and Maven sections. You should be able to chose from preinstalled versions or you can install a new ones. The main thing here is to properly specify JAVA_HOME and MAVEN_HOME variables.
After server is ready you can create a new job from the left hand side menu.
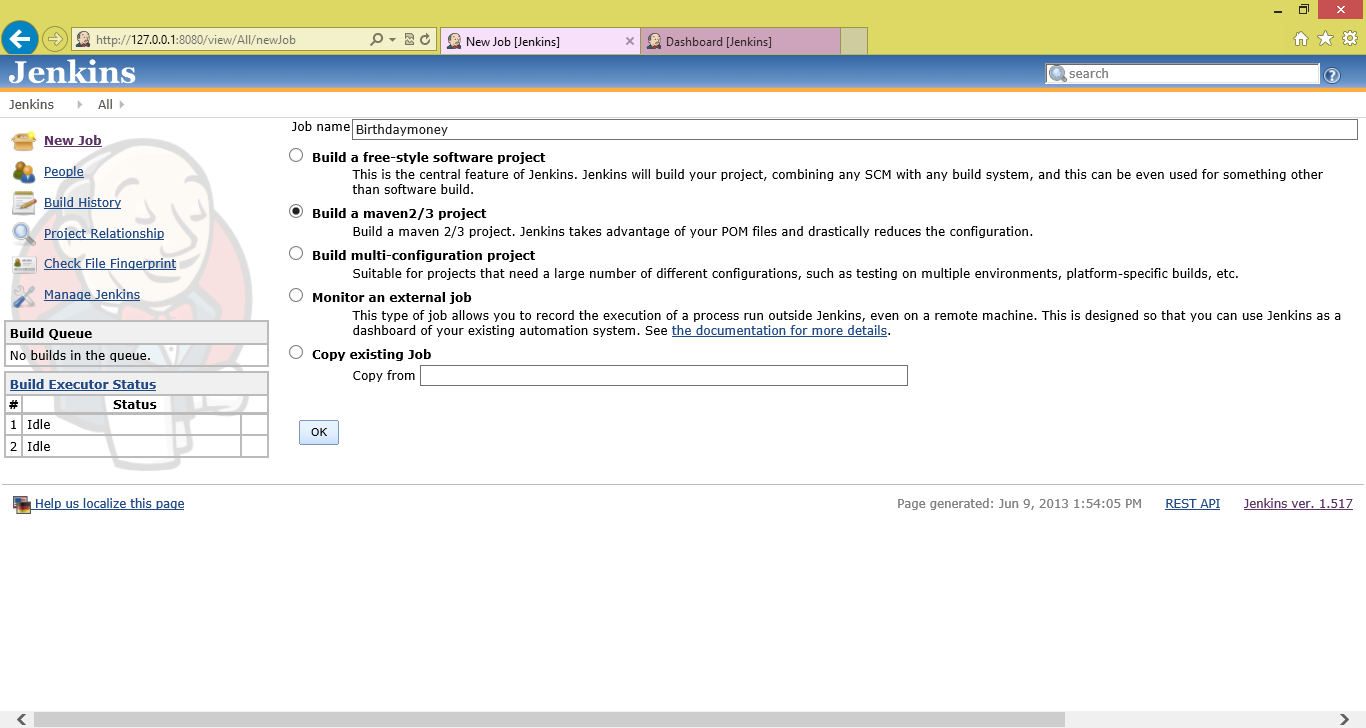
For Maven projects there is already Build a maven 2/3 project option that would eliminate all the manual configuration steps for your project. After that you can move on to the job configuration.
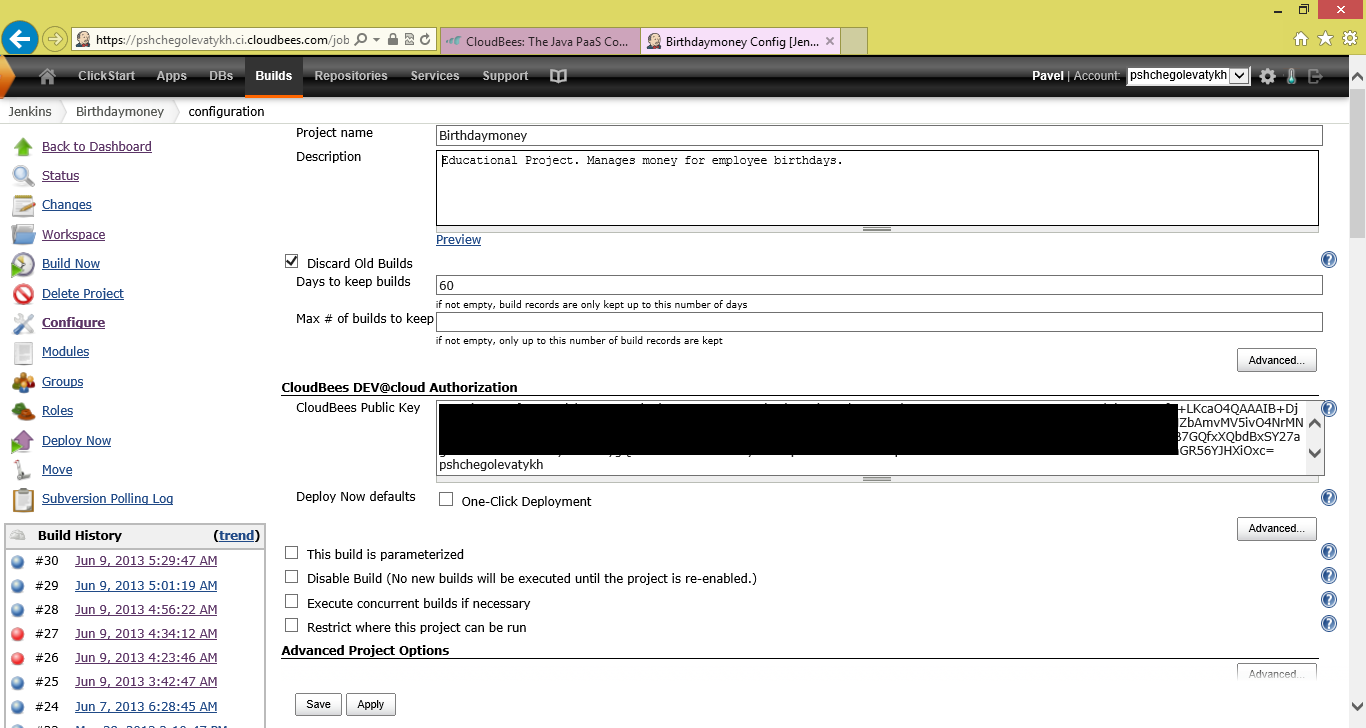
Here you can specify the name of your job. CloudBees public key should be inserted automatically. You obtain it during account registration process. Go to the Source Code Management and Build Triggers sections.

In Source Code Management section you should specify the type and repository URL. Your Code Repository can be installed anywhere including github or google code. Pay attention to the Check-out Strategy option. The Update as much as possible, which is default, does not always work properly (e.g. in my case all the files that should be deleted were still on the CI server). So I prefer Always check-out fresh copy option. It is a bit slower but safe.
The Build Triggers section is used to tell the CI server when to start the build. I prefer periodically Poll SCM to see if there new version available and in the schedule I set all five parameters to stars(*) to poll every minute.
The next two sections are Build and Post Steps.
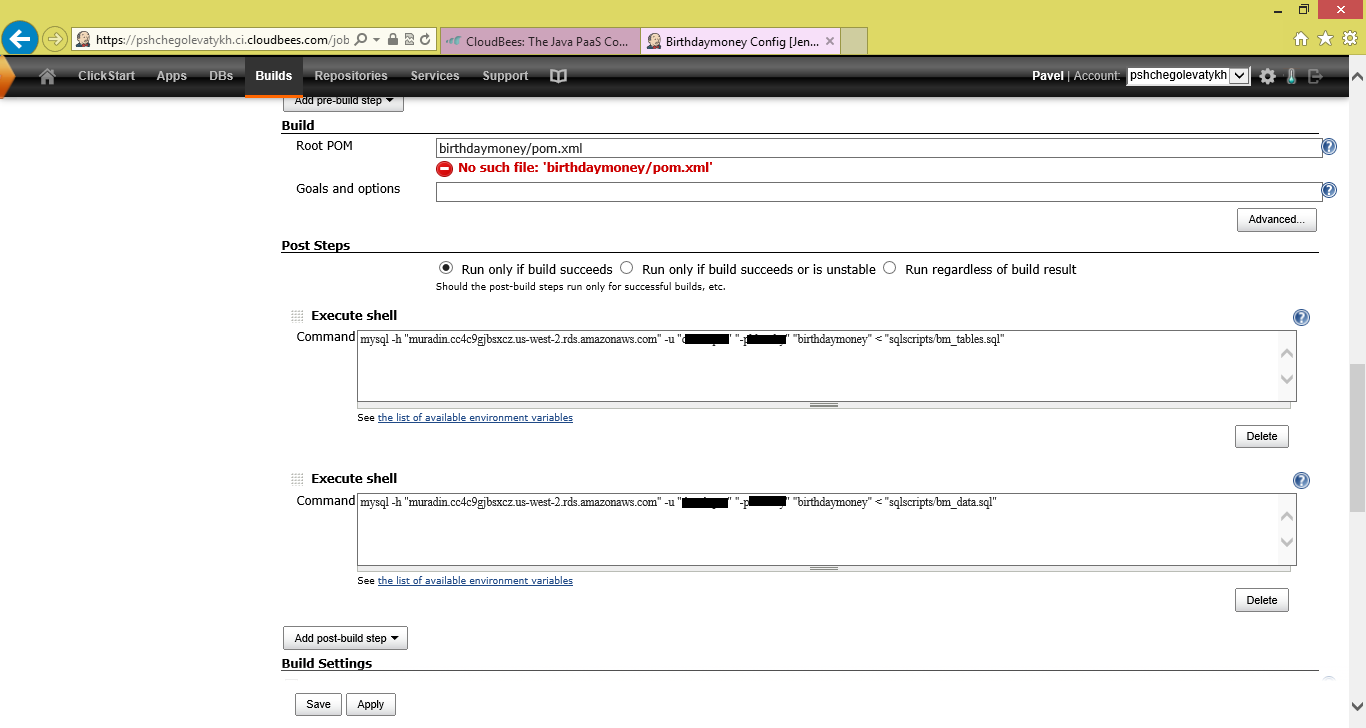
In a Build section for Maven projects specify the path to the *.pom file and additional goals (if necessary).
Post Steps section is perfect to apply new database scripts automatically. I made it that after each build the database is recreated with newly applied scripts (drop tables -> create tables -> insert some test data). In my team we found this really useful.
Build Settings allow you to set up E-mail (or any other) notifications if the build gets broken. So people can fix the build as fast as they can.
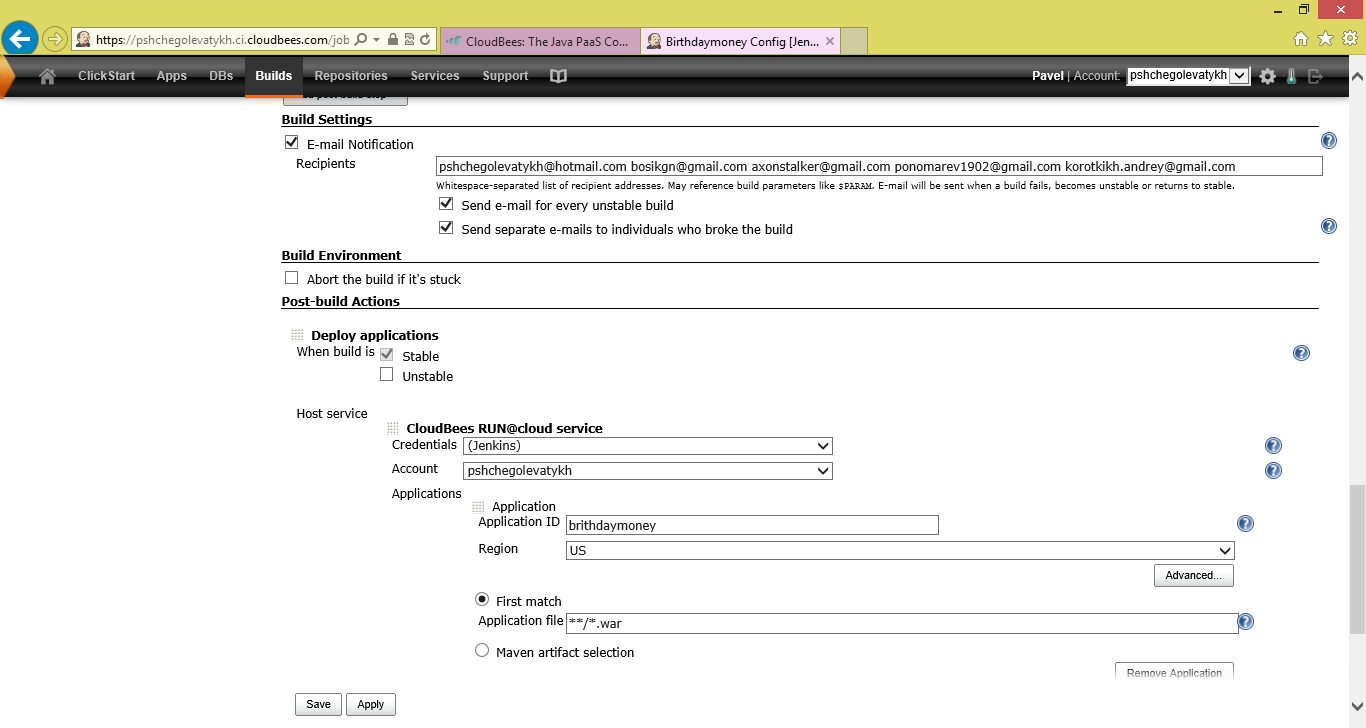
Post-build Actions are mainly used for automated deployment. In case of CloudBees you should provide a valid ApplicationID (should correspond to "Run at Cloud" Application name). The "first match" pattern is used to locate your *.war file and deploy it to the server.
Your job configuration is finally finished. You can click Save button and see if it works.
Allow Anonymous Access to the Job
Jenkins security model is based on roles and permissions. To enable anonymous access you should enable it in Jenkins config first: Manage Jenkins ->Configure System->Enable read-only access for anonymous users. Then you can manage roles using the Roles plugin which should be already installed on CloudBees.
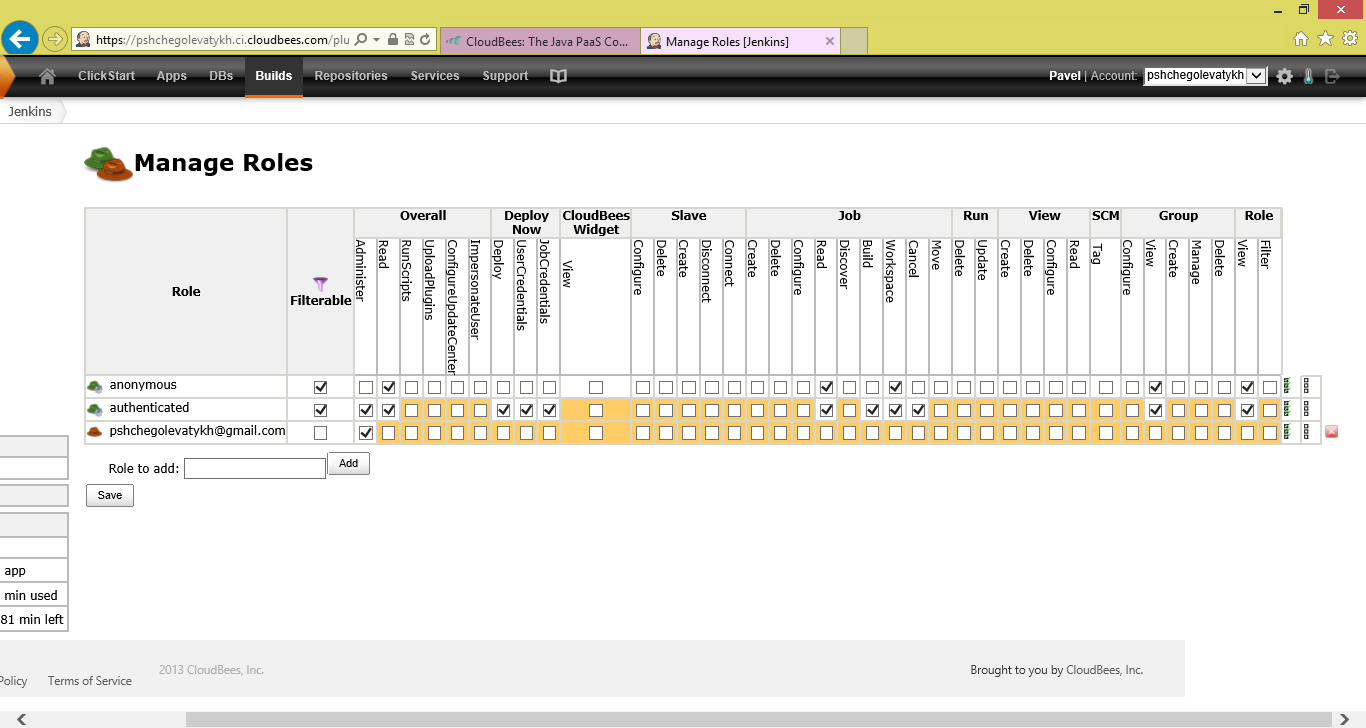
Role editor is pretty self-explanatary. Yellow highlighting means that permission is granted (checked) by default.
Other similar services
If you are a .NET person there is a Team Foundation Service, which includes source control, build server, planing and test execution. It is also free for teams of no more than five people. It is fully integrated with Visual Studio. If you want a free cloud database and some other features that are not presented in TFS you can try AppHarbor. I've tried it and it's great!